
How can we help you ?
-
FAQ
-
Device Help: Lighting
-
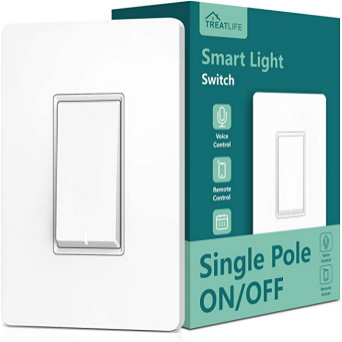
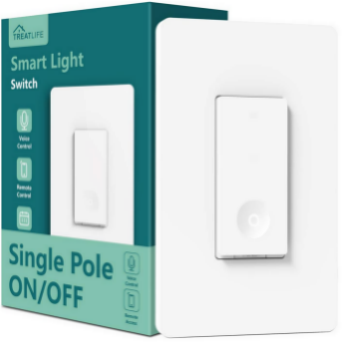
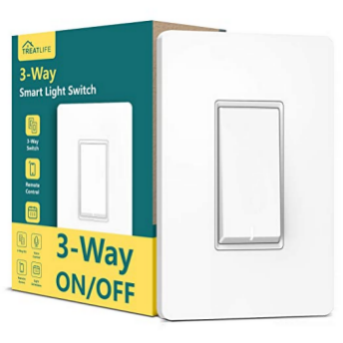
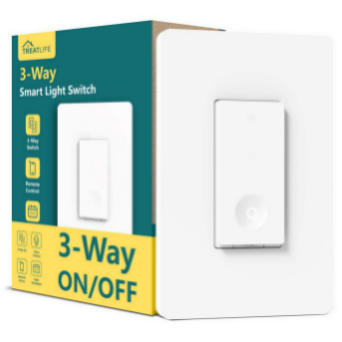
Device Help: Switch
-
Installation Guide & User Manual
-
Device Help: Plug
-
Device Help:Camera
-
Device Help: Smart Sensors and Hub
-
APP Help
-
More About Our Products
Shipping destinations:
- We ship both locally and worldwide.
Shipping times:
- Local orders take 3-5 business days to be delivered to you and we ship within 1-2 business days.
- International orders take 10-15 business days to be delivered and we ship within 2 business days.
- Shipping time might vary depending on location, shipment method, and other factors.
Shipping cost:
- Orders over $30 will have free shipping.
- Orders under $30 will be charged for shipping depending on your chosen delivery method. The full price will be displayed at checkout.
You can select your preferred payment method at checkout.
- We accept secure payments for both local & international customers via Credit Cards, Debit Cards & PayPal.
Note that an additional exchange fee may apply if your currency is other than US dollars.
There could be several possible reasons why a light bulb stops working or burns out immediately after installation:
(1) Confirm that the voltage is 120V, as smart light bulbs are only compatible with 120V. If the voltage is too high, the smart light bulb may flicker or burn out.
(2) Check if the fixture has a short circuit and try using the smart light bulb in another fixture.
(3) If you have ruled out both of the above situations and the problem still persists, please send an email to our support team at support@treatlife.tech for assistance.
(1) Check if you have already pressed the light switch "ON-OFF-ON-OFF-ON."
(2) Press the light switch a few more times and check again.
(3) Move it to another fixture.
(4) If it still fails, please send an email to our support team at support@treatlife.tech.
(1) Check if your router has a limit on the maximum number of connected devices.
(2) Try using AP mode to connect the smart light bulbs to the network and follow the troubleshooting suggestions.
Here are the steps for AP mode:
Open the Treatlife app and tap the "+" icon in the top right corner.
Tap on the device icon on the right side and enter the account and password for your 2.4GHz Wi-Fi network.
Tap on "AP mode" in the top right corner.
Press the light switch "ON-OFF-ON-OFF-ON" until the light bulb flashes rapidly. Then turn on the light switch again until the light bulb flashes slowly.
Tap on "Confirm slow blinking indicator."
Open your phone's Wi-Fi settings and connect to the network named "Treatlife XXX" or "Smartlife XXX."
Go back to the app, continue adding the device, and wait for the connection to complete.
If you cannot find the hotspot of the device named "Treatlife XXX" or "Smartlife XXX," please check if the light bulb is slowly flashing red. The hotspot of the device will only appear when the light bulb is slowly flashing red.
If you can find the hotspot of the device named "Treatlife XXX" or "Smartlife XXX," but it still fails in the last connection. If you have an iPad or another smartphone available, please try using the hotspot of another smartphone instead of using Wi-Fi. Alternatively, you can try using the Smartlife app.
1.Tap on the "+" icon in the top right corner and select "Add Device."
2.Choose "Add Manually" and select "Lighting," then select the appropriate light bulb icon.
3.Enter your 2.4GHz Wi-Fi password.
4.Tap on "EZ mode" in the top right corner.
5.Press the light switch "ON-OFF-ON-OFF-ON" until the light bulb flashes rapidly.
6.Tap on "Confirm indicator rapidly blink"
7.Wait for the connection to complete.
If failed in the last connection, check if your Wi-Fi is indeed a true 2.4GHz network and ensure the router is within range of the smart light bulb. If it still fails, try using the AP mode. You can also try using the Smart Life APP.
Video: https://cdn.shopify.com/videos/c/o/v/172675c821104310990400b739419037.mp4
https://cdn.shopify.com/videos/c/o/v/fc4de9047ffa4821bf8d85a04ff5c757.mp4
1. Tap the “+" on the upper right corner and choose 'Add device';
2. Choose 'Add Manually' and choose the 'Bulb', then choose the right bulb icon;
3. Enter your 2.4G WiFi password.
4. Change from 'EZ Mode' to "AP Mode" in the right corner;
5. Press the light switch 'on-off-on-off-on' until the bulb blinks rapidly. Then press the light switch 'on-off-on-off-on' AGAIN until the bulb blinks slowly.
6. Tap "Confirm indicator slowly blink" and tap 'Connect Now';
7. Jump to the WLAN page automatically, if not, kindly click the WLAN settings: the WI-FI settings on your phone and connect to the "Treatlife-xxx" network;
8. Jump back to Treatlife APP automatically, if not, kindly go back to Treatlife APP, choose 'Confirm hot spot connection, next' and wait for the connection to complete.
If cannot find the device's hotspot 'Treatlife XXX or Smart Life XXX', check whether the bulb is flickering red SLOWLY, this device's hotspot only could appear when the bulb flickering red SLOWLY;
If can find the device's hotspot 'Treatlife XXX or Smart Life XXX', but still failed in the last connection, try another smartphone's hotspot, not wifi if you have iPad or another smartphone.
Steps to try another mobile phone's hotspot: Mobile phone A or iPad download Treatlife APP, mobile phone B turn on the 2.4G personal hotspot. And then connect the mobile phone A/ipad to the 2.4G personal hotspot issued by mobile phone B, and then connect the bulb to Treatlife APP on the mobile phone A/Ipad.
Bulb AP mode: https://cdn.shopify.com/videos/c/o/v/f47dbb794df3427facda29f723d53423.mp4
How to let bulb flicker slowly: https://cdn.shopify.com/videos/c/o/v/9e6b8282d5f548609127c794663f9a7f.mp4
(1) Check if the light bulb is in pairing mode. The light bulb will flicker when it enters pairing mode.
(2) Ensure that the smart light bulb is not connected to a dimmer switch or a smart plug. Smart light bulbs should not be used with any dimmer sockets or smart plugs, as they can cause the bulb to flicker.
(3) Verify that the voltage is 120V. If the voltage is lower or higher than 120V, it can cause the light bulb to flicker. High voltage can also lead to the bulb burning out.
(4) If all smart light bulbs are connected to the same fixture, you can try replacing one of them with a regular light bulb and check if the flickering persists.
If the issue persists or none of the above reasons apply, it is recommended to contact the manufacturer's support team via support@treatlife.tech for further assistance.
(1) Check if you have set up schedules such as sunrise and sunset. Sometimes, the light bulb may be programmed to turn on automatically based on these schedules.
(2) Remove the device from the app and select "Disconnect and Wipe Data." Then, reconnect the device to the app and set it up again.
(3) If the issue persists, please send an email to our support team at support@treatlife.tech for further assistance.
(1) Try turning the smart light bulb on and off directly in the Treatlife app. Check if the color of the smart light bulb matches the color before it was turned off.
(2) If the issue persists, remove the device from the app by selecting "Disconnect and Wipe Data." Then, reconnect the smart light bulb to the app and set it up again.
(3) If the problem continues after removing the light bulb and wiping the data, please send an email to our support team team via support@treatlife.tech for further assistance.
(1) Toggle the smart bulb off and on directly in the Treatlife app to verify if the color matches the preset color before it was turned off.
(2) If the color remains the same, check whether any schedules or automations, such as biorhythm settings, are configured for the smart light bulb.
(3) If the issue persists, remove the smart light bulb from the app and select "Disconnect and Wipe Data" when deleting the device. Then, reconnect the bulb to the app and set it up again.
(4) If the problem continues after removing the light bulb and wiping the data, please send an email to our support team team <support@treatlife.tech> for further assistance.
When you control the light bulbs individually, please check if any of the bulbs exhibit the same issue. If the problem persists with the individual control as well, try replacing the bulbs with fixtures located closer to the router and then recheck again.
(1) If the device is a switch, turn off the power to the switch for 3 minutes.
(2) If the device is a smart bulb/LED strip/plug, try using it in a different location.
(3) If the issue persists, please send an email to our support team at support@treatlife.tech for further assistance.
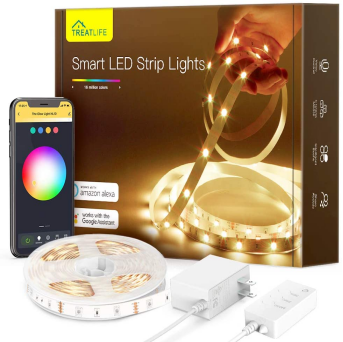
(1) Check whether the light strip is firmly connected to the controller.
(2) Check that the small arrow above is connected in the way of 'arrow to arrow';
(3) If it still fails, please email our support team at support@treatlife.tech.
1. Tap the “+" on the upper right corner;
2. Choose 'Add Manually' and choose 'Lighting', then choose the 'Strip Light' icon;
3. Tap "EZ Mode" in the right corner;
4. Press the ON/OFF button for 5 seconds until the strip light blinks red rapidly;
5. Tap "Confirm indicator rapidly blink";
6. Enter your Wifi password;
7. Wait for the connection to complete.
If failed in the last connection, check whether the Wi-Fi is real 2.4G and near the led strip light to the router. If still failed, try the AP mode and another smartphone's hotspot not wifi if you have iPad or another smartphone. And also can try the Smart Life APP.
1. Tap the “+" on the upper right corner;
2. Choose 'Add Manually' and choose 'Lighting', then choose the 'Strip Light' icon;
3. Tap "AP Mode" in the right corner;
4. Press the ON/OFF button for 5 seconds until the led strip light blinks red rapidly. Then press the ON/OFF button for 5 seconds until the led strip light blinks red SLOWLY.
5. Tap "Confirm indicator slowly blink"
6. Enter your Wifi password.
7. Open WLAN settings; the WI-FI settings on your phone and connect to the "Treatlife-xxx" or ‘’Smart Life XXX'‘, network.
8. Go back to the APP and continue to add the device then wait for the connection to complete.
If cannot find the device's hotspot 'Treatlife XXX or Smart Life XXX', check whether the led strip light is flickering red SLOWLY, this device's hotspot only could appear when the led strip light flickering red SLOWLY;
If can find the device's hotspot 'Treatlife XXX or Smart Life XXX', but still failed in the last connection, try another smartphone's hotspot, not wifi if you have iPad or another smartphone.
Move the cursor to the white area in the middle of the APP.
Kindly contact our support team at support@treatlife.tech with the details about the issue.
Kindly contact our support team at support@treatlife.tech with the details about the issue.
Contact our support team at support@treatlife.tech, and send us the parameter of your adapter, such as input voltage, and output voltage.
(1) Check whether you press the light on/off button 5 seconds first;
(2) Double check, maybe the led is too dim to see it blinking;
(3) Press the on/off button longer;
(4) Cut off the power source and wait for 5 minutes then restart to check;
(4) If check all the above suggestions, but still failed, send mail to our support team at support@treatlife.tech.
1. Tap the “+" on the upper right corner;
2. Choose 'Add Manually' and choose the 'Switch', then choose the right switch icon;
3. Enter your Wifi password.
4. Tap "EZ Mode" in the right corner;
5. Press the ON/OFF button for 5 seconds until the bulb blinks rapidly.
6. Tap "Confirm indicator rapidly blink"
7. Wait for the connection to complete.
Note: Above steps may be a little different.
If failed in the last connection, check whether the Wi-Fi is real 2.4G and near the smart switch to the router. If still failed, try the AP mode and another smartphone's hotspot instead wifi if you have iPad or another smartphone. And also can try the Smart Life APP.
1. Tap the “+" on the upper right corner and choose 'Add device';
2. Choose 'Add Manually' and choose the 'Switch', then choose the right switch icon;
3. Enter your 2.4G WiFi and password.
4. Change from 'EZ Mode' to "AP Mode" in the right corner;
5. Press the ON/OFF button for 5 seconds until the led indicator light blinks red rapidly. Then press the ON/OFF button for 5 seconds until the led indicator light blinks red SLOWLY.
6. Tap "Confirm indicator slowly blink" and tap 'Connect Now';
7. Jump to the WLAN page automatically, if not, kindly click the WLAN settings: the WI-FI settings on your phone and connect to the "Treatlife-xxx" network;
8. Jump back to Treatlife APP automatically, if not, kindly go back to Treatlife APP, choose 'Confirm hot spot connection, next' and wait for the connection to complete.
Note: Above steps maybe a little different.
If cannot find the device's hotspot 'Treatlife XXX or Smart Life XXX', check whether the led indicator light is flickering red SLOWLY, this device's hotspot only could appear when the led indicator light flickering red SLOWLY;
If can find the device's hotspot 'Treatlife XXX or Smart Life XXX', but still failed in the last connection, try another smartphone's hotspot, instead wifi if you have iPad or another smartphone.
Steps to try another mobile phone's hotspot: Mobile phone A or iPad download Treatlife APP, mobile phone B turn on the 2.4G personal hotspot. And then connect the mobile phone A/ipad to the 2.4G personal hotspot issued by mobile phone B, and then connect the bulb to Treatlife APP on the mobile phone A/Ipad.
Switch AP mode: https://cdn.shopify.com/videos/c/o/v/88d7202aa81348ad97381efed1b56519.mp4
How to let switch flicker slowly:https://cdn.shopify.com/videos/c/o/v/d8f2a5e3c8794680af98012afa226a22.mp4
(1) Check whether the router has a limit on the maximum number of connected devices;
(2) Try the AP mode and connect the switches to the network and troubleshoot as suggestions.
Here are the steps for AP mode:
1. Tap the “+" on the upper right corner;
2. Choose 'Add Manually' and choose the 'Switch', then choose the right switch icon;
3. Enter your Wifi password.
4. Tap "AP Mode" in the right corner;
5. Press the ON/OFF button for 5 seconds until the led indicator light blinks red rapidly. Then press the ON/OFF button for 5 seconds until the led indicator light blinks red SLOWLY.
6. Tap "Confirm indicator slowly blink"
7. Open WLAN settings; the WI-FI settings on your phone and connect to the "Treatlife-xxx" or ‘’Smart Life XXX'‘, network.
8. Go back to the APP and continue to add the device then wait for the connection to complete.
Note: Above steps may be a little different.
If cannot find the device's hotspot 'Treatlife XXX or Smart Life XXX', check whether the led indicator light is flickering red SLOWLY, this device's hotspot only could appear when the led indicator light flickering red SLOWLY;
If can find the device's hotspot 'Treatlife XXX or Smart Life XXX', but still failed in the last connection, try another smartphone's hotspot, not wifi if you have iPad or another smartphone.
Cut off the power of the switch for 3 minutes, if the switch still cannot work manually, please contact our support team by sending an email to support@treatlife.tech.
Please verify if the LED indicator light can illuminate.
1. If the LED indicator light does not light up at all:
(1) First, confirm whether the switch is connected to the neutral wire. Note that if your old switch is not a smart switch, there might not be a neutral wire connected to it. The white wire connected to the old switch is not the neutral wire. You can check the electrical box to see if there is a bundle of white wires; if so, those white wires might be the neutral wires.
(2) If the switch is already connected to the neutral wire, for a single-pole smart switch, try swapping the line wire and the load wire and check again. For a three-way smart switch, try swapping the two traveler wires and the line/load wire in sequence.
(3) If your switch is a three-way dimmer switch DS02, in addition to the above two suggestions, check if it is installed on the right side and if it can be installed on the power/input side. You can try it on the other side of the three-way circuit and recheck.
(4) If you have tried all the above suggestions but still have not succeeded, please send an email to our support team at support@treatlife.tech with your order ID, switch model, some photos of the old switch wiring and the electrical box, and detailed information about the issue.
2.If the LED indicator light can illuminate but the light which connect to the switch does not turn on:
Please send an email to our support team at support@treatlife.tech with your order ID, switch model, some photos of the old switch wiring, and detailed information about the issue.
Confirm whether your phone is iPhone or Android phone first.
(1) If it is iPhone, connect the iphone to 2.4G WiFi first, and the connect the switch to Treatlife APP as below steps:
Open Treatlife APP/Smart Life APP ---- Tap Treatlife APP: 'Profile' ---- Choose 'HomeKit Information' ---- 'Add HomeKit device' and scan the code on the surface of the switch ---- wait the connection successfully
After the device connected to Treatlife APP successfully, the switch SS02H will be shown on the Home APP automatically
Attention: If the switch SS02H has been connected to Home APP, but still not added into the Treatlife APP, kindly bind it to Treatlife APP as below steps.
Open Treatlife APP/Smart Life APP ---- Tap Treatlife APP: 'Profile' ---- Choose 'HomeKit Information' ---- It will show the device that has connected to the Home APP, tap the 'Binded' and then the switch will show on the Treatlife.
(2) If it is an Android phone, the switch supports AP mode only. The steps to connect the switch to Android phone are as below:
1. Tap the “+" on the upper right corner;
2. Choose 'Add Manually' and choose the 'Switch', then choose the right switch icon;
3. Enter your Wifi password.
4. Tap "AP Mode" on the right corner;
5. Quickly press the light switch button 5 seconds until the red indicator light blinks rapidly. Then quickly press the light switch button 5 seconds AGAIN until the indicator light blinks slowly.
6. Tap "Confirm indicator slowly blink"
7. Open WLAN settings; the WI-FI settings on your phone and connect to the "Treatlife-sl-xxx" or 'Treatlife-sl-xxx' network.
8. Go back to the APP and continue to add the device then wait for the connection to complete.
Note: The order of above steps may be a little different.
If couldn't find the device's hotspot 'Treatlife XXX or Smart Life XXX', check whether the led indicator light is flickering red SLOWLY, this device's hotspot only could appear when the led indicator light flickering red SLOWLY.
If could find the device's hotspot 'Treatlife XXX or Smart Life XXX', but still failed in the last connection, kindly try the another mobile phone's personal hotspot not wifi and check again if have another smart phone or ipad.
Confirm whether your phone is iPhone or Android phone first.
(1) If it is iPhone, connect the iphone to 2.4G WiFi first, and the connect the switch to Smart Life APP as below steps:
Open Treatlife APP/Smart Life APP ---- Tap Smart Life APP: 'Me' ---- Choose 'HomeKit Information' ---- 'Add HomeKit device' and scan the code on the surface of the switch ---- wait the connection successfully
After the device connected to Smart Life APP successfully, the switch SS02H will be shown on the Home APP automatically
Attention: If the switch SS02H has been connected to Home APP, but still not added into the Smart Life APP, kindly bind it to Smart Life APP as below steps:
Open Treatlife APP/Smart Life APP ---- Tap Smart Life APP: 'Me' ---- Choose 'HomeKit Information' ---- It will show the device that has connected to the Home APP, tap the 'Binded' and then the switch will show on the Smart Life APP.
(2) If it is an Android phone, the switch supports AP mode only. The steps to connect the switch to Android phone are as below.
1. Tap the “+" on the upper right corner;
2. Choose 'Add Manually' and choose the 'Switch (WiFi) ';
3. Enter your Wifi password.
4. Quickly press the light switch button 5 seconds until the red indicator light blinks rapidly. Then quickly press the light switch button 5 seconds AGAIN until the indicator light blinks slowly.
5. Tap "Confirm the indicator is blinking ..." and choose 'Blink Slowly', an then Tap 'Go to Connect';
6. Open WLAN settings; the WI-FI settings on your phone and connect to the "Treatlife-sl-xxx" or 'Smart Life -sl-xxx’ network or a public wifi without password.
7. Go back to the APP and continue to add the device then wait for the connection to complete.
If couldn't find the device's hotspot 'Treatlife XXX or Smart Life XXX', check whether the led indicator light is flickering red SLOWLY, this device's hotspot only could appear when the led indicator light flickering red SLOWLY.
If could find the device's hotspot 'Treatlife XXX or Smart Life XXX', but still failed in the last connection, kindly try the another mobile phone's personal hotspot not wifi and check again if have another smart phone or ipad.
(1) Confirm whether the WiFi is 2.4G, you can try to test with another phone's personal 2.4G hotspot if you have another mobile phone or iPad to confirm whether this issue is caused by the network first;
(2) If your phone is iPhone, cut off the power of the switch and press the on/off button to reset the switch until the led indicator light flickers red, and then connect the switch to Treatlife/Smart Life APP again.
Tap Treatlife APP: 'Profile' or Smart Life APP: 'Me' ---- Choose 'HomeKit Information' ---- 'Add HomeKit device' and scan the code on the surface of the switch ---- Wait for the connection to be successful.
Verify if the LED indicator light on the switch illuminates.
1. If the LED indicator light does not illuminate even after pressing the switch button multiple times, please follow the troubleshooting steps below:
(1) Confirm that the switch is connected to the neutral wire.
Note that smart switches require a connection to the neutral wire in order to function properly. Additionally, if the old switch is a traditional switch rather than a smart switch, there might not be a neutral wire connected to it, and the white wire connected to the old switch is not the neutral wire.
The neutral wire is typically a bundle of white wires located behind the electrical box or directly connected to the light fixture.
(2) Swap the line wire, neutral wire, and load wire in sequence.
(3) Send us some photos of the wiring diagram of the old switch to our support email at support@treatlife.tech, and we will help you identify all the wires on the old switch.
2. If the LED indicator light illuminates, follow the troubleshooting steps below.
(1) Swap the black wire and the red load wire.
(2) Install it on another single-pole circuit.
(3) If it still does not work on another single-pole circuit, please send an email to our support team at support@treatlife.tech.
(1) Check the total power of the connected light bulbs to see if it exceeds the maximum resistive load of 10A or 5A for incandescent bulbs.
(2) Verify if the connected light bulbs are non-smart bulbs.
(3) Install it on another single-pole circuit.
(4) If the issue persists, please send an email to our support team at support@treatlife.tech for further assistance.
1. First, the brightness of the indicator light cannot be modified.
2. If you want to change the status of the indicator light, please follow the steps below:
Connect it to the Treatlife APP and check whether there is 'Light Mode' function on APP as following steps.
Open the Treatlife/Smart Life APP --- Tap on the device --- Tap on the settings icon in the bottom right corner --- Find and tap on "Light Mode" to change the status of the LED indicator light
Please note that not all single-pole smart switches have this feature. It is available only in the new versions. If you cannot find the "Light Mode" feature in the app, please email our support team at support@treatlife.tech with the virtual ID of your switch.
Open the Treatlife/Smart Life APP --- Tap the device --- Click the pen icon in the upper right corner --- Find and Tap the 'Device Information' on the top --- Copy the 'Virtual ID'
Verify if the LED indicator light on the switch illuminates.
1. If the LED indicator light does not illuminate even after pressing the switch button multiple times, please follow the troubleshooting steps below:
(1) Confirm that the switch is connected to the neutral wire.
Note that smart switches require a connection to the neutral wire in order to function properly. Additionally, if the old switch is a traditional switch rather than a smart switch, there might not be a neutral wire connected to it, and the white wire connected to the old switch is not the neutral wire.
The neutral wire is typically a bundle of white wires located behind the electrical box or directly connected to the light fixture.
(2)Verify that the other side of the three-way switch is a non-dimmable switch.
(3)Verify that the switch is connected to the neutral wire, and then proceed to interchange the black wire with the two red neutral wires.
(4)Install it on a single-pole circuit, tightly secure one red wire with a nut, and connect the other three wires (connect the load wire to the other red wire on the switch). If it works on the single-pole circuit, then the switch is functioning properly. Please check the wiring of the previously installed three-way circuit or try it on another three-way circuit.
(5) If it cann't work on a single pole circuit, swap the balck line wire and the red traveler wire first, if it still won't work, kindly send mail to our support at support@treatlife.tech for replacement.
If the LED indicator light is illuminated, follow the steps below for troubleshooting.
(1) Interchange the black wire with the two red wires one by one.
(2) Check if there is a short circuit in the circuit or the light bulb.
(3) Install it on a single-pole circuit, tightly secure one red wire with a nut, and connect the other three wires (connect the load wire to the other red wire on the switch). If it works on the single-pole circuit, then the switch is functioning properly. Please check the wiring of the previously installed three-way circuit or try it on another three-way circuit.
(4) If it can't work on a single pole circuit, swap the balck line wire and the red traveler wire first, if it still won't work, kindly send mail to our support at support@treatlife.tech for replacement.
(1) Swap the two red traveler wires and black line wire in turn;
(2) If still has an issue, send the details about the issue and the photos of the wiring diagram of the old switch to our support team at support@treatlife.tech for help.
(1) Check total power of the bulbs connected to, whether it exceeds 10A Maximum Resistive load 5A Incandescent;
(2) Check whether the bulbs connected to are the NON-SMART bulb;
(3) Check whether the switch in anther side is NON-Dimmable Switch;
(4) Install it on another 3-way circuit or single pole circuit;
(5) if it still has this issue, send mail to our support team at support@treatlife.tech for help.
Connect it to the Treatlife APP and check whether there is an 'Indicator' or 'LED Indicator'. If yes, you can change the status of the led indicator light.
Kindly note that not all the smart switches have this function, only the new version, if you couldn't find the 'Indicator' or 'LED Indicator' function on APP, please send mail to our support team at support@treatlife.tech with the virtual ID of the switch.
Open the Treatlife/Smart Life APP --- Tap the device --- Click the pen icon in the upper right corner --- Find and Tap the 'Device Information' on the top --- Copy the 'Virtual ID'
(1) Check if the LED indicator light on the switch remains consistently on or off without changing its status.
(2) If the LED indicator light doesn't change its status, try using the switch on another three-way circuit or a single-pole circuit where the same model of switch is working properly.
(3) If the same issue persists on another three-way circuit or single-pole circuit, please email our support team at support@treatlife.tech for further assistance.
(4) If the switch works fine on another three-way or single-pole circuit, please check the previously installed circuit for any issues, and you can also reach out to our support team at support@treatlife.tech for help.
(1) Replace the current dimmable smart light bulb with a different model of non-smart dimmable light bulb.
(2) Try using the switch on another circuit.
(3) If the issue persists, please send an email to our support team at support@treatlife.tech for further assistance.
(1) Check if the connected light bulb is a NON Smart Dimmable bulb.
(2) Try three different dimming modes on the app.
(3) Set the brightness to 100% and check if it still flickers.
(4) If the switch is a three-way dimmer switch, check if the other switch on the same circuit is a dimmer switch or a smart switch. Three-way dimmer switches can only be used with non-smart, non-dimmable switches.
(5) If you have incandescent bulbs or other non-smart dimmable bulbs, try replacing them and check again.
(6) If the issue persists, please send an email to our support team at support@treatlife.tech for further assistance.
(1) Check if the connected light bulb is a non-smart dimmable bulb.
(2) If it was previously working fine and suddenly stopped dimming manually, try cutting off the switch power for 3 minutes and then check again. If it still fails, please send an email to our support team at support@treatlife.tech with detailed information about the issue.
(1) Check whether the bulbs connected to are NON-Smart Dimmable bulbs;
(2) Try the three dimming modes on APP;
(3) If you have an incandescent bulb or another NON-Smart Dimmable Bulb, try to replace these bulbs and check again;
(4) If still failed, send mail to our support team at support@treatlife.tech for help.
(1) Check if the connected light bulb is a non-smart dimmable bulb.
(2) Verify if manual dimming is possible.
If manual dimming is possible, remove the switch from the Treatlife application and reconnect it.
If manual dimming is not possible, cut off the switch power for 3 minutes and then check again. If the issue persists, please send an email to our support team at support@treatlife.tech along with detailed information about the problem.
(1) Set the dimming range to 1%~100% and then check again.
(2) Consider replacing the current non-smart dimmable bulb with a different model or type.
Verify if the LED indicator light on the switch illuminates.
1. If the LED indicator light does not illuminate even after pressing the switch button multiple times, please follow the troubleshooting steps below:
(1) Confirm that the switch is connected to the neutral wire.
Note that smart switches require a connection to the neutral wire in order to function properly. Additionally, if the old switch is a traditional switch rather than a smart switch, there might not be a neutral wire connected to it, and the white wire connected to the old switch is not the neutral wire.
The neutral wire is typically a bundle of white wires located behind the electrical box or directly connected to the light fixture.
(2) Swap the line wire, neutral wire, and load wire in sequence.
(3) Send us some photos of the wiring diagram of the old switch to our support email at support@treatlife.tech and we will help you identify all the wires on the old switch.
2. If the LED indicator light illuminates, follow the troubleshooting steps below.
(1) Swap the black wire and the red load wire.
(2) Install it on another single-pole circuit.
(3) If it still does not work on another single-pole circuit, please send an email to our support team at support@treatlife.tech
(1) Check if the total power consumption of the connected bulbs exceeds the maximum limit specified for the switch. For example, for DS02S model, ensure it is not exceeding 150W for LED bulbs, 300W for incandescent bulbs. For DS01 model, ensure it is not exceeding 400W for incandescent bulbs.
(2) Verify that the connected bulbs are non-smart and non-dimmable. Smart switches may not be compatible with dimmable bulbs, so using non-dimmable bulbs is recommended.
(3) Install the switch on another single-pole circuit to check if the issue persists. This will help determine if the problem is specific to the circuit or the switch itself.
(4) If the issue continues after trying the above steps, please contact our support team at support@treatlife.tech for further assistance.
Kindly help to confirm whether you encounter the following situation 1 or situation 2, and then follow the solution.
Situation 1:Both single pole dimmer switches are turned off, turning on the switch will turn on another dimmer switch, or adjusting the brightness of switch A, the bulbs connected to switch B will be turned on or flicker. But when both switches are turned on, they all can work fine.
Situation 2:Both single pole dimmer switches are turned off, turning on the switch will turn on another dimmer switch, or adjusting the brightness of switch A, the bulbs connected to switch B will be turned on or flicker. And when both switches are turned on, adjusting the brightness of switch A will change the brightness of switch B or let switch B flicker.
For situation 1, you can replace the single pole dimmer switch with the 3-way dimmer switch DS02 or replace the bulbs.
For situation 2, the only solution is to replace the bulbs.
For the 3-way dimmer switch DS02, Please note the following precautions, thank you.
(1) If it is installed on a 3-way circuit, it must be installed on the power source side, otherwise it will not work;
(2) One 3-way circuit only could install one 3-way dimmer switch DS02, the other switch in the same 3-way circuit must be a 3-way dumb switch(no-smart, no-dimmable);
(3) The bulb connected must be a no-smart dimmable bulb, we recommend the brand such as Philip, GE, or Feit;
(4) If the led indicator light will flick WHITE or turn off automatically after being turned on, kindly check whether the power of the lights connected exceeds 150LED/400INC;
If the power meets the requirement, kindly try it on the single pole circuit and check again.
Verify if the LED indicator light on the switch illuminates.
1. If the LED indicator light does not illuminate even after pressing the switch button multiple times, please follow the troubleshooting steps below:
(1) Confirm that the switch is connected to the neutral wire.
Note that smart switches require a connection to the neutral wire in order to function properly. Additionally, if the old switch is a traditional switch rather than a smart switch, there might not be a neutral wire connected to it, and the white wire connected to the old switch is not the neutral wire.
The neutral wire is typically a bundle of white wires located behind the electrical box or directly connected to the light fixture.
(2) Confirm the 3-way dimmer switch DS02 is installed on the side near the power source, if the switch isn't installed on the side near the power source, it won't work;
(3) Check whether you have installed two packs of 3-way dimmer switch DS02 in the same circuit. One circuit only installs one 3-way dimmer switch, the other switch in the same circuit must be a dumb switch(non-smart, non-dimmable);
(4) If you meet the three requirements mentioned above, install it on a single-pole circuit by sealing a red wire with a nut and connecting the other three wires (connect the load wire to the other red wire on the switch). If it works on the single-pole circuit, then the switch is not the issue. Please check the wiring of the previously installed 3-way circuit and replace the two traveler wires and line wires sequentially.
(5) If it cann't work on a single pole circuit, swap the balck line wire and the red traveler wire first, if it still won't work, kindly send mail to our support at support@treatlife.tech for replacement.
2 If the LED indicator light is illuminated, follow the steps below for troubleshooting.
(1) Interchange the black wire with the two red wires one by one.
(2) Check if there is a short circuit in the circuit or the light bulb.
(3) Install it on a single-pole circuit, tightly secure one red wire with a nut, and connect the other three wires (connect the load wire to the other red wire on the switch). If it works on the single-pole circuit, then the switch is functioning properly. Please check the wiring of the previously installed three-way circuit or try it on another three-way circuit.
(4) If it can't work on a single pole circuit, swap the balck line wire and the red traveler wire first, if it still won't work, kindly send mail to our support at support@treatlife.tech for replacement.
(1) Swap the two red wires and the black wire one by one.
(2) If the same problem persists or the 3-way dimmer switch doesn't work, try installing it on the other side as the side where this switch is installed may not be the power side.
(3) If the issue still persists, please send the detailed information about the problem and the photos of the wiring diagram of the old switch to our support team at support@treatlife.tech for further assistance.
(1) Check if the total power of the connected light bulbs exceeds 150W LED/400W INC.
(2) Verify if the connected light bulbs are non-smart dimmable bulbs.
(3) Check if the other switch in the same circuit is a traditional switch (non-smart, non-dimmable).
(4) Install the switch on a single-pole circuit and check if the issue still persists. If the problem continues, please send an email to our support team at support@treatlife.tech for further assistance.
Connect the switch to Treatlife APP and check whether there is an "indicator" function on the APP, you could change the status of the led indicator light via this function.
(1) Check if you can adjust the fan speed in the Alexa/Google Home app.
(2) If you can adjust the fan speed in the Alexa/Google Home app but voice commands are not working, make sure the language setting in the Alexa/Google Home app is set to English. Try using commands like "Alexa, set {device name} speed to level 4" to control the fan speed.
(3) Check if there are any other devices with the same name as the fan.
(4) If the issue persists, please send an email to our support team at support@treatlife.tech with the details of the problem.
Check if the fan has 4 speeds. If it is a 3-lever fan or a 5-lever fan, the fan may be not compatible with the fan/light switch DS02F.
(1) If the fan is controlled by the chain before, must set the fan speed to maximum before installing the fan/light switch DS03;
(2) Confirm that the fan does not have a remote control, not a smart fan that can be connected to Bluetooth or WiFi.
This is because that Google Home doesn't support this function, you can set the fan speed with a command, such as 'Hello Google, set the {device name} to level 4 or so on.
(1) The fan must be a 4-level fan;
(2) The fan cannot be a smart fan that can be connected via Bluetooth or wifi;
(3) The fan cannot have a remote control;
(4) The fan cannot be an exhaust fan.
(5) The old switch must have 4 wires, neutral wire, fan load wire, line wire, and ground wire. The neutral wire is needed, otherwise, the switch won't work.
Verify if the LED indicator light on the switch illuminates.
1. If the LED indicator light does not illuminate even after pressing the switch button multiple times, please follow the troubleshooting steps below:
(1) Confirm that the switch is connected to the neutral wire.
Note that smart switches require a connection to the neutral wire in order to function properly. Additionally, if the old switch is a traditional switch rather than a smart switch, there might not be a neutral wire connected to it, and the white wire connected to the old switch is not the neutral wire.
The neutral wire is typically a bundle of white wires located behind the electrical box or directly connected to the light fixture.
(2) Swap the wiring connections of the line wire, neutral wire, and load wire in sequence.
(3) Please send the photos of the wiring diagram of the old switch to our support email at support@treatlife.tech. We will assist you in identifying all the wires on the old switch.
2. If the LED indicator light is illuminated, follow the troubleshooting steps below.
(1) Swap the black wire and the yellow load wire.
(2) Install it on another circuit.
(3) If it still doesn't work on another circuit, please send an email to our support team at support@treatlife.tech.
(1) Check if the power of the fan exceeds the maximum power limit of the switch, which is 1.5A.
(2) Install the switch on another circuit or in a position where another switch of the same model is working properly.
(3) If the issue persists, please send an email to our support team at support@treatlife.tech for further assistance.
For the fan/light switch DS03, Please note the following precautions, thank you.
(1) The fan must be a 4-level fan;
(2) The fan cannot be a smart fan that can be connected via Bluetooth or wifi;
(3) The fan cannot have a remote control;
(4) The fan cannot be an exhaust fan.
(5) The bulb connected must be a no-smart dimmable bulb, we recommend the brand such as Philip, GE, or Feit;
(6) The old switch must have 5 wires, neutral wire, fan load wire, light load wire, line wire, and ground wire. The neutral wire is needed, otherwise, the switch won't work; Must have two separate wires for the fan and light on the old switch.
Verify if the LED indicator light on the switch illuminates.
1. If the LED indicator light does not illuminate even after pressing the switch button multiple times, please follow the troubleshooting steps below:
(1) Confirm that the switch is connected to the neutral wire.
Note that smart switches require a connection to the neutral wire in order to function properly. Additionally, if the old switch is a traditional switch rather than a smart switch, there might not be a neutral wire connected to it, and the white wire connected to the old switch is not the neutral wire.
The neutral wire is typically a bundle of white wires located behind the electrical box or directly connected to the light fixture.
(2) Test the voltage of all wires and identify the wire that consistently has a voltage of 120V. This wire is the line wire of the circuit.
(3) Please send some photos of the wiring diagram of the old switch to our support team at support@treatlife.tech. We will assist you in identifying all the wires on the old switch.
If the LED indicator light is working properly, follow these troubleshooting steps:
(1) Check if the fan load wire and the light load wire are connected to the same wire, or if the old switch has only one load wire.
(2) For further assistance, please send an email to our support team at support@treatlife.tech.
Because Google/Alexa doesn't have a specific category for lights/fans, the fan/light switch DS03 is divided into three separate devices. If you haven't changed the names in the Treatlife Life application, these three devices should be one device named 'light', two fans named ' fan', and 'Ceiling fan dimmer switch DS03'.
(1) Check the Alexa/Google Home app to see if turning on the light also triggers the fan.
(2) If this issue only occurs with voice commands, check if the voice command you're using includes both device names. For example, if you named the fan as "Bedroom" and the light as "Light," saying "Bedroom Light" would activate both the fan and the light.
(3) Change the names of the three devices (fan/light switch) in the Treatlife app and check again. (Note: The fan/light switch DS03 appears as three devices on Alexa/Google Home.)
(1) Try turning off the power for 5 minutes and then restart it.
(2) If the problem persists, please contact our support team at support@treatlife.tech for further assistance.
ATTENTION
l The Treatlife 3-way light switch can replace existing 3-way or single-pole light switches.
l If you purchased a 3-way bundle, you only need to install one of them per circuit. Feel free to install the remaining 3-way switches in different locations.
l Neutral wire is required to install the smart switch. If your house was built or remodeled before mid-80's, you may not have a neutral. Please try another location or call an electrician for help.
l Install your Treatlife where you have a strong Wi-Fi signal.
l Keep your mobile device close to the Treatlife light switch until setup is complete.
l The supported maximum wattage rating is: 1250W.
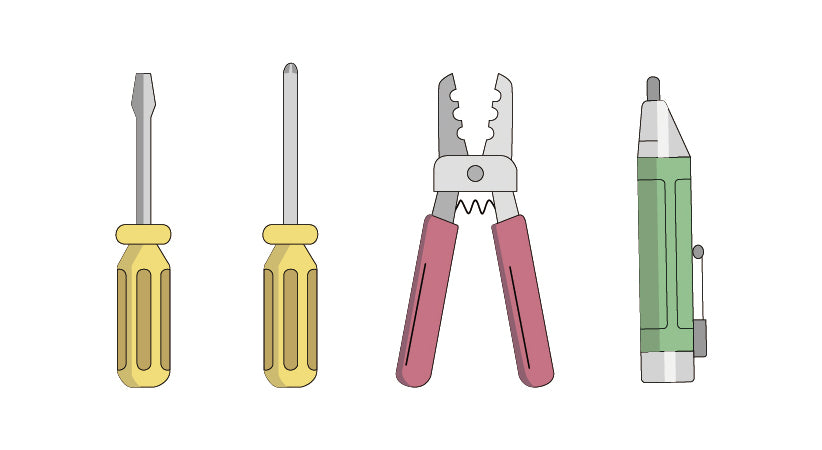
The Tools You'll Need
l Screwdriver
l Pliers
l Electrical Tester
1. Turn Off Power
Locate your circuit breaker panel and turn off the power to each switch you are replacing
Caution:
Risk of shock.
Make sure the power to every switch you are replacing has been turned off before installation.
Please call a professional electrician if you are not familiar with electrical work.
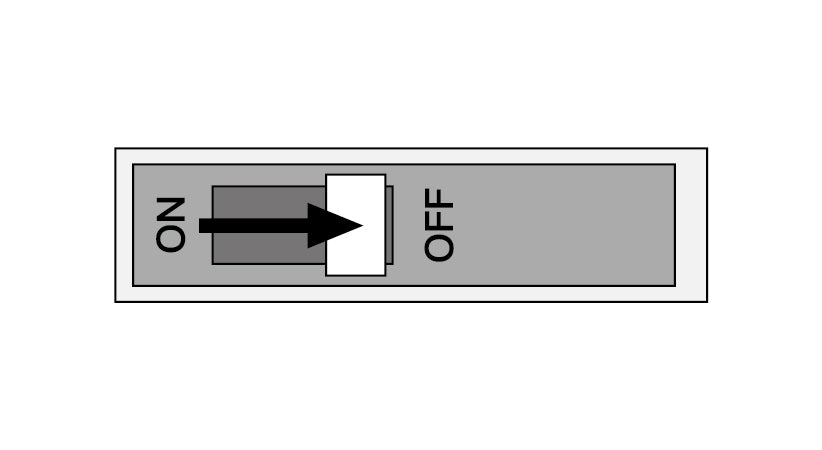
2. Verify Power Is Off
Press each light switch at the location you’re doing the installation to confirm power is off.
If a light turns on, return the panel to turn off the correct circuit. We recommend you to remove the faceplate from the old switch and use electrical tester to test all wires connected to the switch to ensure there is no voltage in the circuit.
You may need to turn off more than one circuit breaker.
3. Pull Out Old Switch
Unscrew the old switch and pull it out of the wall. Do not remove any wires.
4. Identify the Old Switch
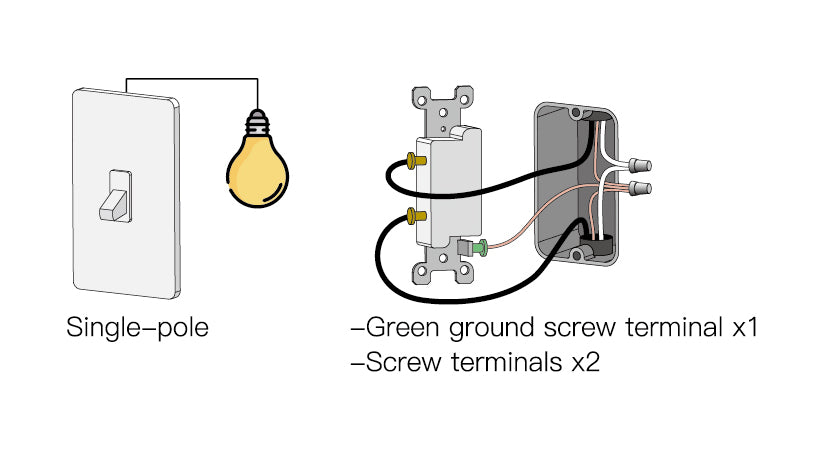
A Single-pole Switch
Only one switch controls one light or a bundle of lights.
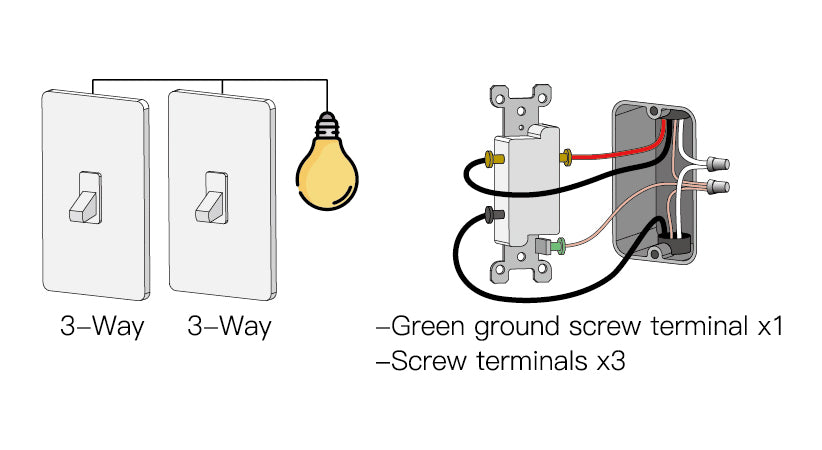
B 3-way Switch
Two switches control the same light or the same bundle of lights.
C 4-way Switch
If three switches control the same light or the same bundle of lights, one of the switches is a 4-way switch. The other two are 3-way switches.
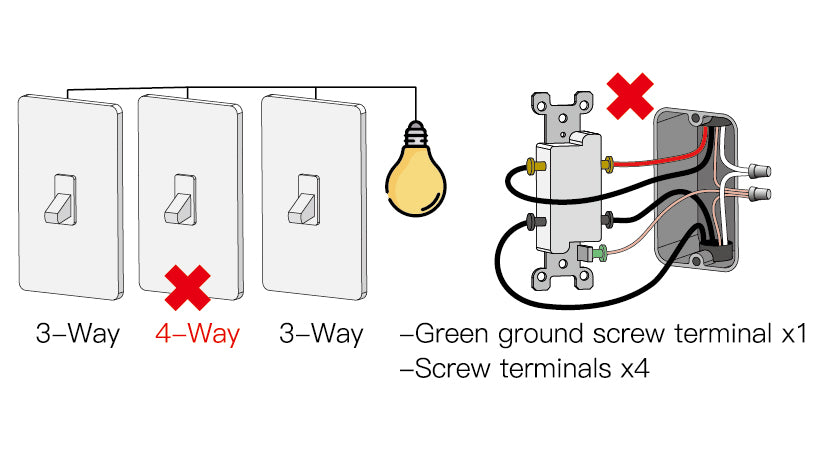
Screw the 4-way switch back to the wall, and unscrew one of the other two 3-way switches on the circuit that controls the same light.
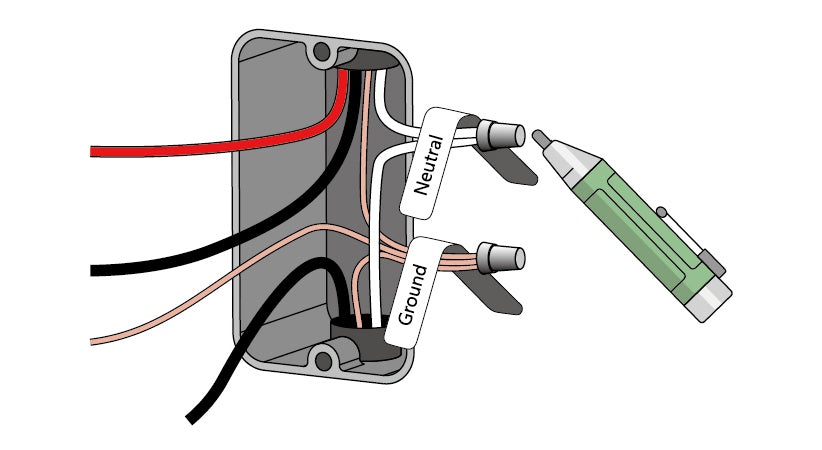
5. Find the NEUTRAL Wires
A neutral is required to install the smart light switch.
Make sure there are NEUTRAL wires (most likely a bundle of one or more white wires ) in the wall. Unless you are replacing an existing smart switch, it’s probably not connected to your old switch.
Note: If there is no neutral, please try another location or call an electrician for help.
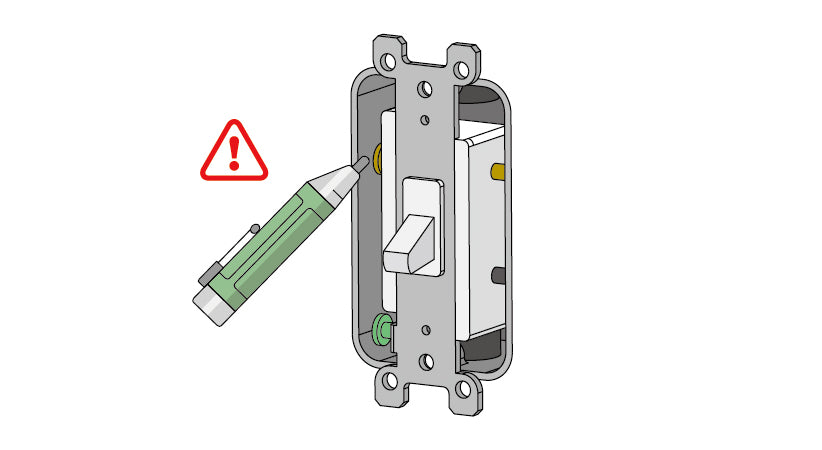
6. Test NEUTRAL and GROUND Wires
Make sure there is no power on the neutral wires from a neighboring circuit. If necessary, shut off additional circuits until no voltage is found.
l Label the NEUTRAL and GROUND wire in the wall with the stickers in the package.
GROUND wires are usually BARE COPPER or GREEN.
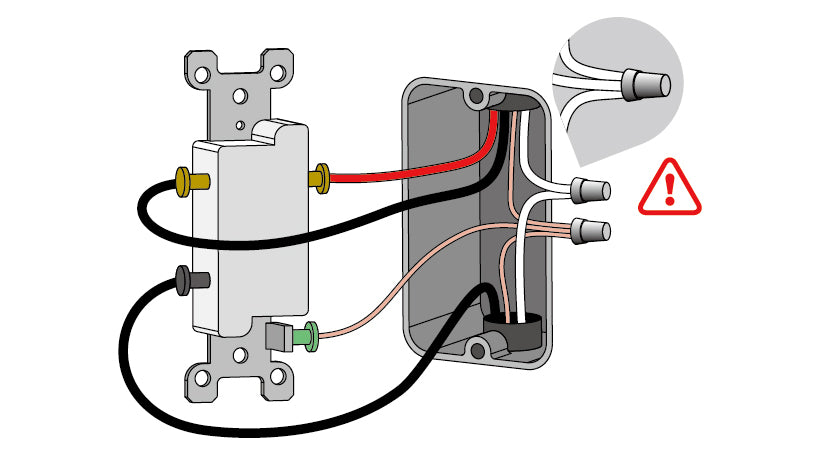
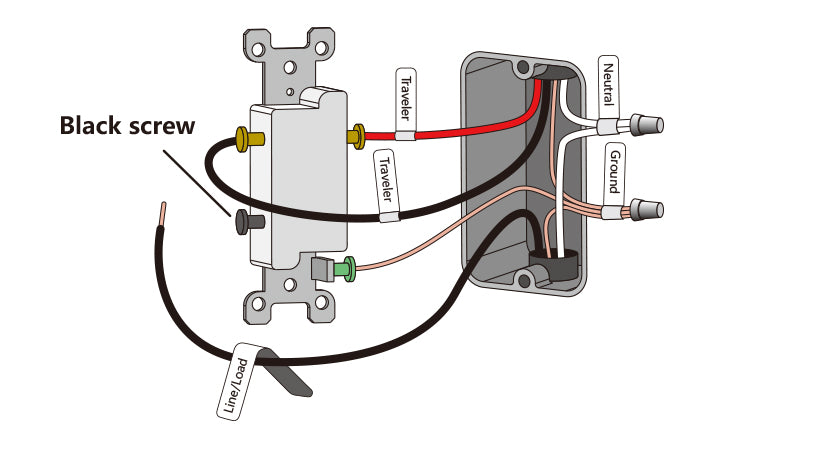
7. Identify Line/Load Wire
Note: The wires may be different colors than shown.
A Single Pole Only
l Label the remaining two wires in the wall with the two “Line/Load” stickers in the package.
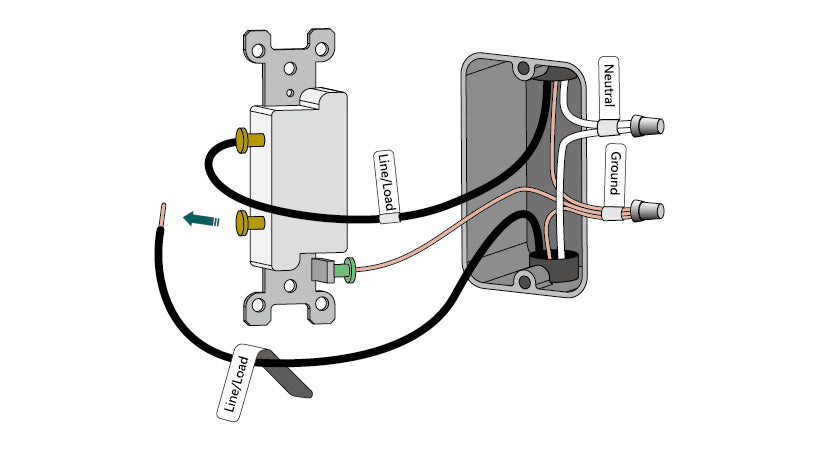
B 3-way only
l Label the LINE/LOAD wire (usually BLACK, attached with a black screw, and may be labeled “common".) in the wall with the “Line/Load” sticker.
l Label the remaining two wires with the “Traveler" stickers in the package.
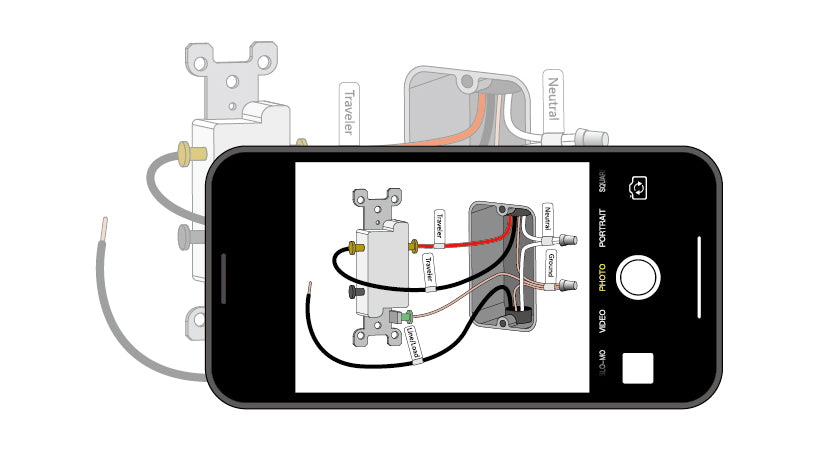
8. Take Pictures of the Wiring
Take one or two pictures of the old switch and where each wire is connected to it, in case you need guidance to repeat the installation.
Note: Make sure all of the text on the labels in the pictures is clearly displayed.
9. Remove Existing Switch
Loosen the screw terminals and remove the old switch.

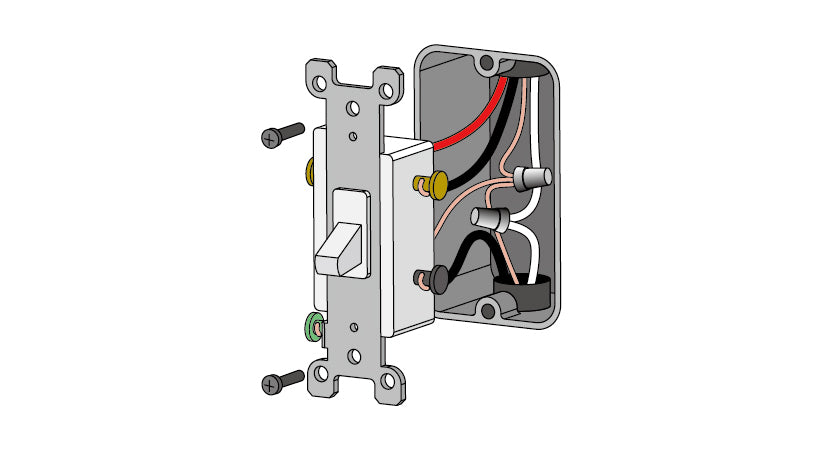
10. Wire the Smart Switch
Remove the sticker securing the wires on the new switch.
A Single Pole Only
Connect NEUTRAL/GROUND Wires
Use wire nuts to connect the neutral and ground wires on the Treatlife Light Switch to the labeled wires coming from the wall in order.
Connect LINE/LOAD Wires
Use a wire nut to connect the LINE/LOAD wire from Treatlife Light Switch to one of the labeled “Line/Load" wires coming from the wall.
Use a wire nut to connect one of the TRAVELER wires from Treatlife Light Switch to the LINE/LOAD wire coming from the wall.
Cap off the remaining TRAVELER wire from the Switch with a wire nut.
B 3-way only
Connect NEUTRAL, GROUND, LINE/LOAD Wires
Use wire nuts to connect these different wires from Treatlife Light Switch to the labeled wires coming from the wall.
Connect TRAVELER Wires
Use wire nuts to connect the RED wires from the Switch to the TRAVELER wires coming from the wall.
11. Install Light Switch Into the Wall
Hold the wire nuts and gently pull each wire to make sure the wire nuts are secure. Carefully push the wires deep into the switch box. Attach the Light Switch to the switch box with the screws provided. Finally, snap on the faceplate.
Note: Do not over tighten the screws, as it could restrict the operation of the switch.
12. Turn on Power
Turn power back on at the circuit breaker.
Press the on/off button to confirm whether the switch is powered on/off normally. If the light fixture can not be turned off/on, or sometimes the light switch can not be turned on or off, the wiring maybe incorrect or the nuts are loose. Please refer to the instructions in the manual or call an electrician for help.

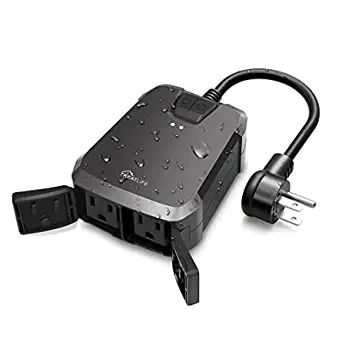
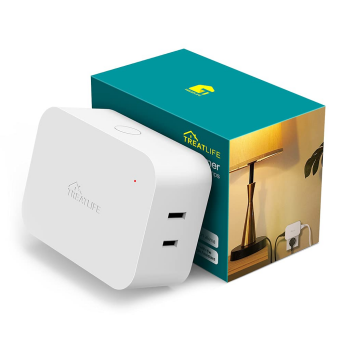
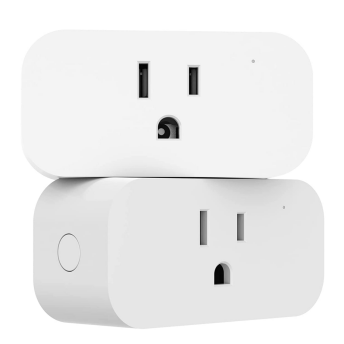
Outdoor Dimmer Plug DP10 PDF ↓ Outdoor Dimmer Plug (two sockets) DP12 PDF ↓ Indoor Dimer Plug DP20 PDF ↓ Smart Mini Plug SK50 PDF ↓
 https://cdn.shopifycdn.net/s/files/1/0246/5601/9501/files/DP20_0ad24f1b-d12d-43bd-81e6-6ede6daf1418.png?v=1646447436
 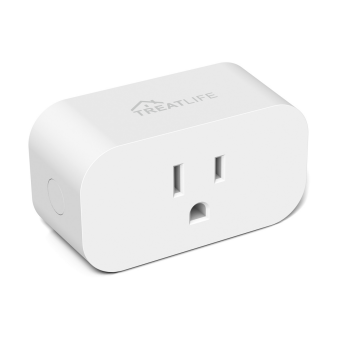 https://cdn.shopifycdn.net/s/files/1/0246/5601/9501/files/DP12.png?v=1646447469
Outdoor Homekit Smart Plug SK30H PDF ↓ Treatlife Homekit Smart Plug SK50H PDF ↓

 https://cdn.shopifycdn.net/s/files/1/0246/5601/9501/files/SK30H.png?v=1660102973
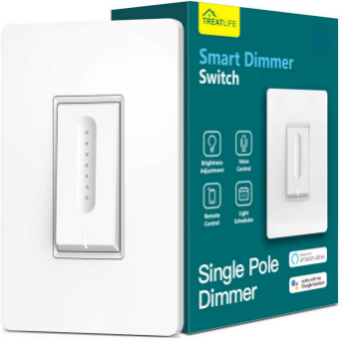
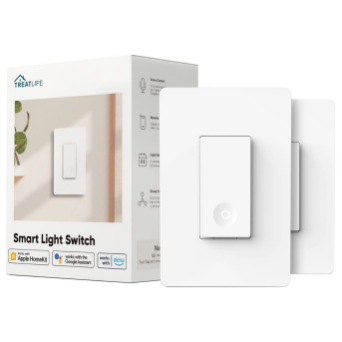
Single Pole Smart Switch SS01S PDF ↓ Single Pole Smart Switch SS02S PDF ↓ 3-Way Smart Switch SS01 PDF ↓ 3-Way Smart Switch SS02 PDF ↓
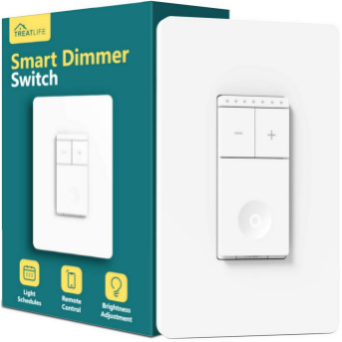
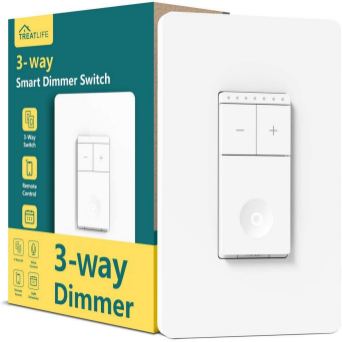
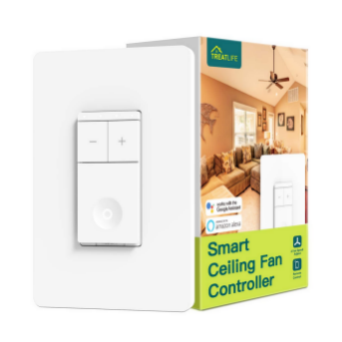
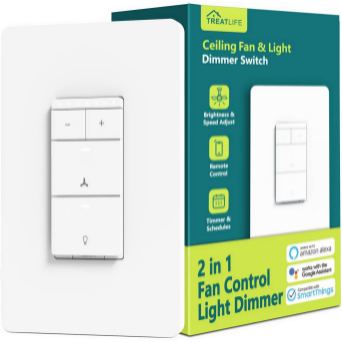
Single Pole Dimer Switch Switch DS01 PDF ↓ Single Pole Dimer Switch Switch DS02S PDF ↓ 3-Way Dimmer Switch DS02 PDF ↓ Ceiling Fan Switch DS02F PDF ↓
https://cdn.shopifycdn.net/s/files/1/0246/5601/9501/files/DS01_efdcd7e0-76e9-4ac5-93e8-1a65bbb97f51.png?v=1646464837
Fan/light Switch DS03 PDF ↓ Single Pole Smart Switch SS02SH PDF ↓
https://cdn.shopifycdn.net/s/files/1/0246/5601/9501/files/DS01_efdcd7e0-76e9-4ac5-93e8-1a65bbb97f51.png?v=1646464837
https://cdn.shopifycdn.net/s/files/1/0246/5601/9501/files/SS02.png?v=1646452161


1. Tap the “+" on the upper right corner;
2. Choose 'Add Manually' and choose the 'Plug', then choose the right plug icon;
3. Tap "EZ Mode" in the right corner;
4. Press the ON/OFF button 3 times until the led indicator light blinks red rapidly;
5. Tap "Confirm indicator rapidly blink";
6. Enter your Wifi password;
7. Wait for the connection to complete.
If failed in the last connection, check whether the Wi-Fi is real 2.4G and near the dimmer plug to the router. If still failed, try the AP mode and another smartphone's hotspot not wifi if you have iPad or another smartphone. And also can try the Smart Life APP.
1. Tap the “+" on the upper right corner and choose 'Add device';
2. Choose 'Add Manually' and choose the 'Plug', then choose the right dimmer plug icon 'Outdoor Dimmer';
3. Change from default 'EZ Mode' to "AP Mode" on the right corner
4. Quickly press the on/off button 3 times until the red indicator light blinks rapidly(the led indicator light won't stop flickering red). Then quickly press the on/off button 3 times AGAIN until the indicator light blinks red SLOWLY(the led indicator light flickers red about once a second).
5. Tap "Confirm indicator slowly blink".
6. Enter your 2.4G WiFi name and password (kindly note that don't enter the device's hot spot name here) and choose 'Next', then choose 'Connect now
7. Jump to the WLAN page automatically, if not, kindly click the WLAN settings: the WI-FI settings on your phone and connect to the "Treatlife-xxx" network;
8. Jump back to Treatlife APP automatically, if not, kindly go back to Treatlife APP, choose 'Confirm hot spot connection, next' and wait for the connection to complete.
If cannot find the device's hotspot 'Treatlife XXX or Smart Life XXX', check whether the led indicator light is flickering red SLOWLY, this device's hotspot only could appear when the led indicator light flickering red SLOWLY;
If can find the device's hotspot 'Treatlife XXX or Smart Life XXX', but still failed in the last connection, try another smartphone's hotspot, not wifi if you have iPad or another smartphone.
Steps to try another mobile phone's hotspot: Mobile phone A or iPad download Treatlife APP, mobile phone B turn on the 2.4G personal hotspot as in the below photo. And then connect the mobile phone A/ipad to the 2.4G personal hotspot issued by mobile phone B, and then connect the bulb to Treatlife APP on the mobile phone A/Ipad.
Plug AP Mode:https://cdn.shopify.com/videos/c/o/v/df5e4e1bb7cb49ee8c4d6c7806390584.mp4
How to let plug flicker slowly: https://cdn.shopify.com/videos/c/o/v/960813aa4f2946a796bfa6006af30f8c.mp4
(1) Check if the LED indicator light is turning on.
(2) If the LED indicator light is on, check if the light bulb has a built-in remote control. Verify if the light bulb can be connected via WiFi or Bluetooth. For floor lamps or table lamps, confirm if there is an A/C output (For indoor dimmer plug DP20).
(3) If the LED indicator light doesn't turn on, try plugging it into a different outlet.
(4) If the issue persists, please send an email to our support team at support@treatlife.tech.
(1) Check if the light bulb is a dimmable bulb.
(2) Check if the connected strip light/floor lamp/table lamp has a remote control.
(3) Verify if the light bulb can be connected via WiFi or Bluetooth.
(4) Check if the floor lamp or table lamp has an A/C output (For indoor dimmer plug DP20).
(5) Set the brightness to 100%. If the light does not flicker, try using another strip light/table lamp/floor lamp. If the light still flickers, please send an email to our support team at support@treatlife.tech.
If the LED indicator light turns on and the dimmer plug can be manually turned on/off, but the LED indicator light doesn't flash red, please follow the troubleshooting steps below:
(1) First, check if you pressed the on/off button 3 times.
(2) Press the power button once more and check again.
(3) If you have tried all the above suggestions and still encounter a failure, please send an email to our support team at support@treatlife.tech.
(1) Check if the power exceeds the maximum limit: 150W/LED 400W/INC for DP10; 150W/LED 30W/INC for DP20; 600W for DP12, 300W Max for each socket.
(2) Check if the light bulb has a built-in remote control.
(3) Verify if the light bulb can be connected via WiFi or Bluetooth.
(4) Check if the floor lamp or table lamp has an A/C output (For indoor dimmer plug DP20).
You can send an email to our support team at support@treatlife.tech for further assistance.
First, check if the connected light bulb is a dimmable bulb. If it is, check if the light bulb falls into any of the following three scenarios, as these can prevent the plug from functioning properly:
(1) Check if the light bulb has a built-in remote control.
(2) Verify if the light bulb can be connected via WiFi or Bluetooth.
(3) Check if the floor lamp or table lamp has an A/C output (For indoor dimmer plug DP20).
(1) Check if the brightness is set to "Off."
(2) Set the dimming range to 10%-100% and check again.
(3) If the issue persists, please send an email to our support team at support@treatlife.tech.
(1) Check if the power exceeds the maximum limit: 150W/LED 400W/INC for DP10; 150W/LED 30W/INC for DP20; 600W for DP12, 300W Max for each.
(2) Try plugging it into another outlet.
(3) If the issue persists, please send an email to our support team at support@treatlife.tech.
(1) Confirm that the switch has connected to a real 2.4G Wi-Fi; All the router broadcast in the U.S. and Canada are both 2.4G and 5G, check whether you have set different names and passwords for them, and connect the switch to the 2.4G wifi only? For how to set the 2.4G and 5G network separately, could you read the router user manual or contact the manufacturer: Please do not connect the switches to public Wi-Fi.
(2) Confirm if there are any special symbols (eg: '=&" {}) in the Wi-Fi name and password;
(3) Double-check the Wi-Fi name and password. Please delete the blank at the end;
(4) Near the device to your router;
(5) Try the AP mode as the user manual;
(6) Download the Smart Life APP;
(7) If you have an iPad or other smartphone, connect the device to another smartphone's hotspot and check again.
If you have tried all the above steps and still cannot connect the Smart Mini Plug, please contact our support team at support@treatlife.tech for further assistance..
1. Tap the “+" on the upper right corner;
2. Choose 'Add Manually' and choose the 'Plug', then choose the ’Mini Plug' icon;
3. Enter your Wifi password.
4. Change from 'EZ mode to "AP Mode" in the right corner;
5. Press the ON/OFF button for 5 seconds until the led indicator light blinks red rapidly. Then press the ON/OFF button for 5 seconds until the led indicator light blinks red SLOWLY.
6. Enter your 2.4G WiFi name and password(kindly note that don't enter the device's hot spot name here) and choose 'Next', then choose 'Connect now
7. Jump to the WLAN page automatically, if not, kindly click the WLAN settings: the WI-FI settings on your phone and connect to the "Treatlife-xxx" network;
8. Jump back to Treatlife APP automatically, if not, kindly go back to Treatlife APP, choose 'Confirm hot spot connection, next' and wait for the connection to complete.
If cannot find the device's hotspot 'Treatlife XXX or Smart Life XXX', check whether the led indicator light is flickering red SLOWLY, this device's hotspot only could appear when the led indicator light flickering red SLOWLY;
If can find the device's hotspot 'Treatlife XXX or Smart Life XXX', but still failed in the last connection, try another smartphone's hotspot instead WiFi if you have iPad or another smartphone.
(1) Check if the connected device is a smart device or has a remote control and A/C output. The Smart Mini Plug SK50 cannot be used with these types of devices.
(2) Verify if the issue also occurs when manually controlling the plug.
(3) If the issue persists when manually controlling the plug, please send an email to our support team at support@treatlife.tech with detailed information about the problem.
(4) If the issue does not occur when manually controlling the plug, delete the device from the Treatlife app and choose "Disconnect and Wipe Data" when removing the device.
Confirm whether your phone is iPhone or Android phone first.
(1) If it is iPhone, connect the iPhone to 2.4G WiFi first, and then connect the PLUG to Treatlife APP as per the below steps.
Open Treatlife APP/Smart Life APP ---- Tap Treatlife APP: 'Profile' ---- Choose 'HomeKit Information' ---- 'Add HomeKit device' and scan the code on the surface of the plug ---- wait for the connection successfullyAfter the plug is connected to Treatlife APP successfully, the HomeKit plug will be shown on the Home APP automatically
Attention: If the HomeKit smart plug has been connected to Home APP, but is still not added to the Treatlife APP, kindly bind it to Treatlife APP as per the below steps.
Open Treatlife APP/Smart Life APP ---- Tap Treatlife APP: 'Profile' ---- Choose 'HomeKit Information' ---- It will show the device that has connected to the Home APP, tap the 'Binded' and then the plug will show on the Treatlife.
(2) If it is an Android phone, the HomeKit supports AP mode only.
The steps to connect the HomeKit plug to an Android phone are as below:
- Tap the “+" on the upper right corner;
- Choose 'Add Manually' and choose the 'Plug', then choose the 'Smart Outdoor Plug' or 'Mini Plug' icon;
- Enter your 2.4G WiFi password.
- Tap "AP Mode" in the right corner;
- Press the on/off button for 5 seconds until the red indicator light blinks RED/PINK.
- Tap "Confirm indicator slowly blink"
- Open WLAN settings; the WI-FI settings on your phone and connect to the "Treatlife-SL-xxx" or 'Smart Life-xxx' network.
- Go back to the APP and continue to add the device then wait for the connection to complete.
If could find the device's hotspot 'Treatlife XXX or Smart Life XXX', but still failed in the last connection, kindly try another mobile phone's hotspot, instead wifi, and check again if have another smartphone or iPad.
Steps to try another mobile phone's hotspot: Mobile phone A or ipad download Treatlife APP, mobile phone B turn on the 2.4G personal hotspot. And then connect the mobile phone A/ipad to the 2.4G personal hotspot issued by the mobile phone B, and then connect the bulb to Treatlife APP on mobile phone A/Ipad.
(1) Please confirm if your WiFi is on the 2.4GHz frequency. If you have another phone or iPad, you can try using the personal 2.4GHz hotspot of that device to test and determine if the issue is related to the network.
(2) If you are using an iPhone, unplug the device and plug it back in. Then press and hold the power button for 5 seconds to reset the HomeKit plug until the LED indicator flashes red. After that, reconnect the HomeKit plug to the Treatlife/Smart Life application.
In the Treatlife app, go to "Profile," or in the Smart Life app, go to "Me." Select "HomeKit Information" and then "Add HomeKit Device." Scan the code on the surface of the switch and wait for the connection to be successful.
Please note that QR code on the rounded edge of the camera which is not used for connection, but for resolving subsequent product issue if need. And you have to USE THE Treatlife Outdoor CAMERA TO scan the QR code on the Treatlife APP, which shows on the step for your connection. Not the QR code on the surface of the camera.
Adding the Camera to the App
• Tap the '+' button at the top-right corner of the Home tab.
• Select 'Add Device' > 'Cameras' > 'ProSight PS10'.
Power On the Device
• Connect the camera to its power source.
Reset the Camera
• Press and hold the 'RESET' button until you hear the "ready to connect" prompt.
Wi-Fi Setup
• Click 'Next' in the app, then enter your Wi-Fi details to generate a QR code.
• Scan QR Code with Treatlife Camera
(Carefully remove the protective film from the camera lens)
• Use your Treatlife camera to scan the QR code displayed on your phone's screen, maintaining a 15-20 cm distance.
• Await a confirmation prompt to complete the setup.
1.Place the camera near the router.
2.Confirm the camera power on beeps twice every 15 seconds before scanning the QR code.
3.Ensure the camera scans the QR code correctly.
4.If problems persist, reset the camera and restart the pairing process.
1.Avoid poor lighting and extreme contrast areas for the camera.
2.Don't aim it directly at strong light sources like sunlight.
3.Ensure your phone and router have at least 2 Mbps bandwidth for HD video streaming. Otherwise, the stream will downgrade to SD.
1.Confirm that app notifications are enabled on your phone.
2.Ensure your phone has a stable network connection.
3.Verify that the camera is currently online.
For less alerts, move the camera from busy area
1.Verify if Wi-Fi settings have been altered. If changed, reset the camera.
2.Ensure the router is both powered on and connected to the internet.
3.Confirm the camera is powered on.
4.Check that the router has a stable network bandwidth.
5.Ensure you are using the latest version of the app.
Use up to 256GB micro SD cards, FAT32 format, with Class 10 read & write speed.
With insufficient light and the spotlight on, it activates the spotlight until sufficient light is detected. If the spotlight is off, it switches to starlight full-color mode.
No subscription needed. Enjoy AI detection, local storage, and more at no extra cost.
No. Use the provided DC power adapter for power and WiFi for connectivity.
Yes. Stream to Alexa Echo Show and Google Assistant.
Select “Profile” on the Treatlife app and choose Third-Party Voice Services.
Choose Alexa or Google Assistant, as needed and follow the on-screen instructions.
No. It's compatible with Alexa Echo Show and Google Assistant only.
When Privacy Mode is on, the camera goes to standby, with no recording or alerts.
Absolutely. Choose between faster 5 GHz or extended range 2.4 GHz, both with WPA3 encryption.
They are predefined camera views. Set up to 6 in the app for one-click access.
1. Open the device page and tap on the top right "..." to enter settings.
2. Navigate to "Advanced Settings" and select "Onvif". Set and note down the password and current IP.
3. On an NVR monitor connected to the same network, select "Add Device" to complete the process.
Yes,It natively runs Human and Vehicle Detection on the local AI.
AI tracking ensures subjects stay within the camera's view, capturing events fully.
1. Open the device page and tap on the top right "..." to access settings.
2. Under "Advanced Settings", find "Alert Settings" and turn on "Human Detection".
3. Go back to the "Advanced Settings" section and enable "Vehicle Detection".
1. Open the device page and tap on the bottom bar "Features". Look for "Auto Tracking" and turn it on.
2. Alternatively, tap on the top right "..." to access settings, then navigate to "Advanced Settings" and "Alert Settings". Turn on "Auto Motion Tracking".
Yes, when using local storage.
1. Open the device page and click on the top right "..." to go to settings.
2. Navigate to "Recording Settings", enable "Local Recording", and select the "Continuous Recording" mode.
In Auto Mode, it's black and white in total darkness. In low light, it shifts to starlight full-color. Motion activates the spotlight, which turns off after 1 minute without movement.
In low light, the view switches to black and white.
Please note that QR code on the rounded edge of the camera which is not used for connection, but for resolving subsequent product issue if need. And you have to USE THE Treatlife Indoor CAMERA TO scan the QR code on the Treatlife APP, which shows on the step for your connection. Not the QR code on the surface of the camera.
Adding the Camera to the App
• Tap the '+' button at the top-right corner of the Home tab.
• Select 'Add Device' > 'Cameras' > 'ProSight PP10'.
Power On the Device
• Connect the camera to its power source.
Reset the Camera
• Press and hold the 'RESET' button until you hear the "ready to connect" prompt.
Wi-Fi Setup
• Click 'Next' in the app, then enter your Wi-Fi details to generate a QR code.
• Scan QR Code with Treatlife Camera
(Carefully remove the protective film from the camera lens)
• Use your Treatlife camera to scan the QR code displayed on your phone's screen, maintaining a 15-20 cm distance.
• Await a confirmation prompt to complete the setup.
No subscription needed. Enjoy AI detection, local storage, and more at no extra cost.
No. Use the provided DC power adapter for power and WiFi for connectivity.
Use up to 256GB micro SD cards, FAT32 format, with Class 10 read & write speed.
Yes. Stream to Alexa Echo Show and Google Assistant.
Select “Profile” on the Treatlife app and choose Third-Party Voice Services.
Choose Alexa or Google Assistant, as needed and follow the on-screen instructions.
No. It's compatible with Alexa Echo Show and Google Assistant only.
When Privacy Mode is on, the camera goes to standby, with no recording or alerts.
Absolutely. Choose between faster 5 GHz or extended range 2.4 GHz, both with WPA3 encryption.
They are predefined camera views. Set up to 6 in the app for one-click access.
1. Open the device page and tap on the top right "..." to enter settings.
2. Navigate to "Advanced Settings" and select "Onvif". Set and note down the password and current IP.
3. On an NVR monitor connected to the same network, select "Add Device" to complete the process.
Yes,It natively runs Human Detection on the local AI.
AI tracking ensures subjects stay within the camera's view, capturing events fully.
1. Open the device page and tap on the top right "..." to access settings.
2. Under "Advanced Settings", find "Alert Settings" and turn on "Human Detection".
1. Open the device page and tap on the bottom bar "Features". Look for "Auto Tracking" and turn it on.
2. Alternatively, tap on the top right "..." to access settings, then navigate to "Advanced Settings" and "Alert Settings". Turn on "Auto Motion Tracking".
Yes, when using local storage.
1. Open the device page and click on the top right "..." to go to settings.
2. Navigate to "Recording Settings", enable "Local Recording", and select the "Continuous Recording" mode.
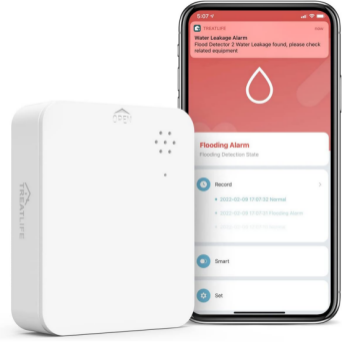
Connect the Smoke& CO Alarm to APP:
1. Tap the “+" on the upper right corner and choose 'Add device';
2. Choose 'Sensor', and tap the 'Smoke & CO Alarm' icon;
3. Enter the 2.4G WiFi name and password (kindly note that don't enter the device's hot spot name here) and choose 'Next' ;
4. Press and hold the TEST/SILENCE button for 5 seconds until the led indicator flickers;
5. Choose 'Confirm indicator rapidly blink' and tap' Next';
6.Waiting for complete the connection
1 . Quickly click the first Alarm test button 5 times, the green light will flash slowly, after 6 seconds you will hear " Pairing, please wait ", and the green light will be always on.2 . Quickly press the second Alarm Test Button 5 times, the Green light flashes slowly for 6 seconds ( it needs to be completed within 60s after the first Alarm's light is always on), you will hear " Pairing Success ", indicating that the addition alarm is added successful.
3 . If you hear " Pairing failed ", please repeat steps 1 and 2 until its successful
4 . Repeat steps 1-2 for additional Treatlife Alarms
1. Connect the Smoke& CO Alarm to Treatlife APP first
2.Select the Smoke& CO Alarm--- Automation---Click the “+” at the bottom right--If “when the device status changes”---Select the the Smoke& CO Alarm and the function.
3.Then----Select the Treatlife device you want to link with the Smoke& CO Alarm
Connect the Hub to APP:
1. Tap the “+" on the upper right corner and choose 'Add device';
2. Choose 'Hub', and tap the 'Smart Hub' icon;
3. Press and hold the on/off button 5 seconds until the led indicator flickers;
4. Choose ' Confirm the indicator is blinking slowly' and tap' Next'
5 . Enter the 2.4G WiFi name and password (kindly note that don't enter the device's hot spot name here) and choose 'Next' , then choose 'Connect now';
6. Jump to the WLAN page automatically, if not, kindly click the WLAN settings: the WI-FI settings on your phone and connect to the "Treatlife-SL-xxxx" or 'SmartLife-xxxx' network (Aftering connecting to device's hotspot “TreatLife SL-XXXX”or 'Smart Life-XXXX', about 2S, device's hotspot will show “No internet connection”, this is right, don't care it and proceed as follows in step 8);
7.Go back to Treatlife APP manually and wait for the connection to complete, if when you go back to the Treatlife APP, it doesn't jump to connection page, kindly choose 'Confirm hot spot connection, next' and wait for the connection to complete.
Connect the Sensor/Detector to APP:
1. Tap the 'Smart Hub' and enter the Hub's control page;
2. Choose 'Zigbee device list' and then choose 'Add new devices';
3. Press and hold the on/off button 5 seconds until the led indicator of sensor/detector flickers;
4. Click the sensor/detector will detected by the APP and wait for the connection successfully.
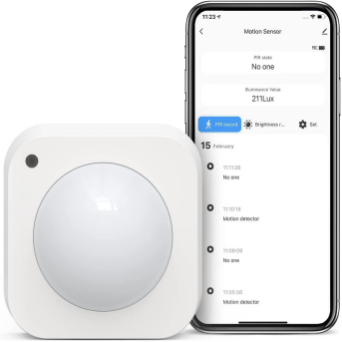
【Step 1: Turn On Linkage Switch when Motion is Detected】
1. Access the motion sensor's control page.
2. Go to settings and select "Smart Routine."
3. Add a new automation rule by clicking the "+" symbol.
4. Choose "When the Device Status Changes" as the trigger.
5. Select the motion sensor and set it to "Motion Detector."
6. Add an action to run the switch device and set it to "On."
7. Save the settings.
【Step 2: Turn Off Linkage Switch When No Motion is Detected】
1. Access the motion sensor's control page.
2. Go to settings and select "Smart Routine."
3. Add a new automation rule by clicking the "+" symbol.
4. Choose "When the Device Status Changes" as the trigger.
5. Select the motion sensor and set the duration for "No one."
6. Add an action to run the switch device and set it to "Off."
7. Save the settings.
(1) Please try again after waiting for some time.
(2) If you have another email address, try using that instead.
(3) Download the Smart Life app and give it a try.
(4) If you are unable to receive the verification code on both apps, please follow these steps:
If you haven't received the email, temporarily disable the spam filter in your email settings. Also, add our mailing address, system.az@notice.2.ismartlife.me, and domain to your secure mailing list. Check your spam folder to see if the email ended up there.
If you still haven't received the email after trying the above methods, we recommend contacting your email service provider and providing the following information to their administrator. Ask them to check if the email is saved in their system and whether it has been successfully forwarded to your email address.
The email address we sent the verification code to is: system.az@notice.2.ismartlife.me
Please confirm if the account you are trying to log in which is registered on the Treatlife website. If it is, please re-register on the Treatlife APP. The accounts for the Treatlife website and the Treatlife APP are separate.
Enter the APP --- Profile --- Click the setting icon on the upper right corner --- Account and Security --- ' Email Address'--- 'Change Mail' --- Enter the password---And then bind to new mail address
Enter the APP --- Profile --- Click the setting icon on the upper right corner --- Account and Security --- Change login Password --- Get Verification Code --- Enter the verification code you received then the password will be changed.
There are three methods for multiple users to control the same devices:
1.Treatlife/SmartLife apps support multiple users logging in to the same account on multiple devices.
2. You can share devices with multiple users by following these steps:
(1) Go to the detailed device page in the app.
(2) Click on the 'Pen' icon located in the upper right corner.
(3) Select "Device Sharing" to share the device with other users.
3.You can add family management to a master account and authorize other accounts to control the devices under the master account. Here is the steps:
Open your Treatlife APP---Profile--Home Management--Home Settings--Add member
Open the Treatlife/Smart Life APP --- Tap the device --- Click the pen icon in the upper right corner --- Find and Tap the 'Device Information' on the top --- Find the 'MAC address'
Go to the detailed device page --- Click the 'Pen' on the upper right corner --- Click the 'Pen' on the top --- Click the 'Name' --- Rename the device and confirm it.
Choose one of the devices you want to group-- Enter the device interface --- Click the 'pen' upper right corner --- Create Group --- Choose all the devices you want to group --- Enter group name --- Return to All device and you will see the group
Enter the APP --- Smart--Automation --- Click the '+' on the upper right corner --- When weather changes --- Sunset/Sunrise--- And choose the time you want --- Next --- Run the device----Select the device you want to control
(1) Confirm that the switch is connected to a genuine 2.4GHz Wi-Fi network. In the United States and Canada, most routers broadcast both 2.4GHz and 5GHz networks. Check if you have set different names and passwords for these networks and make sure to connect the switch to the 2.4GHz Wi-Fi only. Refer to your router's user manual or contact the manufacturer for instructions on how to set up separate 2.4GHz and 5GHz networks. Note: Do not connect the switches to public Wi-Fi networks.
(2) Verify that there are no special symbols (e.g., '=&"" {}) in the Wi-Fi name and password.
(3) Double-check the Wi-Fi name and password, ensuring there are no trailing spaces.
(4) Move the device closer to your router to improve the signal strength.
(5) Try using the AP mode as described in the user manual.
(6) Download the Smart Life app and attempt to connect the devices through that APP.
(7) If you have an iPad or another smartphone available, try connecting the device to another smartphone's personal hotspot and check the connectivity.
If the issue persists, please contact our support team at support@treatlife.tech for further assistance.
According to the instructions on the user manual, try AP mode and follow the steps below to troubleshoot.
(1) Check for Device Hotspot: If you cannot find the device's hotspot named 'Treatlife XXX' or 'Smart Life XXX', make sure that the bulb or red LED indicator light is flickering slowly. The device's hotspot will only appear when the bulb or red LED indicator light is flickering slowly in red.
(2) Connect to Personal Hotspot: If you can find the device's hotspot but still fail to connect in the final step, try connecting the device to another smartphone or iPad's personal hotspot instead of Wi-Fi, if you have another smart phone or ipad.
(3) If you have followed the above steps and are still unable to connect the devices, please send an email to our support team at support@treatlife.tech for further assistance.
Here are some possible reasons and troubleshooting steps:
1. Use Treatlife App for Pairing: Make sure you add the Bluetooth device in the Treatlife app, not through the phone's Bluetooth pairing interface.
2. Check Wi-Fi and Router: Ensure that the Wi-Fi switch on your phone is turned on, and the router is functioning properly.
3. iPhone Network Connection: When pairing a Bluetooth device, ensure that your iPhone is connected to the internet. The Bluetooth device needs to be registered on the cloud server for successful addition.
4. Android Location Permission: If you are using an Android phone, ensure that the app has permission to access your device's location.
5. Reset and Re-Add: If the device has been previously added but is not connecting, try resetting the Bluetooth device and adding it again.
6. Check Bluetooth Distance: Ensure that the distance between the Bluetooth gateway (if applicable) and the Bluetooth device is moderate (less than 3 meters). It is recommended to keep them as close as possible. If there is no Bluetooth gateway, you can skip this step and connect directly to the phone.
7. Exclusive Bluetooth Control: Check if other users are currently using the Bluetooth device. Bluetooth devices can only be controlled and used by one user at a time. If another user is using it, the device may be offline.
8. Compatibility with Non-Treatlife Devices: Note that our app only supports Treatlife Bluetooth devices due to specific private protocols. Other brands of Bluetooth devices cannot be added to our app and even if added successfully, they cannot be controlled.
If you have ruled out the above possibilities and your device still cannot connect to the internet, please refer to the user manual for EZ mode or AP mode for further assistance. Thank you.
If you are experiencing issues reconnecting your device to the Treatlife app after it went offline, please follow these troubleshooting steps:
1. Restart the Router:
2. Try AP Mode: If restarting the router does not work, refer to the user manual and try AP mode. Follow these steps:
If you cannot find the device's hotspot named 'Treatlife XXX' or 'Smart Life XXX', check if the bulb or red LED indicator light is flickering slowly in red. The device's hotspot will only appear when the bulb or red LED indicator light is flickering slowly.
If you can find the device's hotspot, but still fail to connect in the final step, try connecting the device to another smartphone or iPad's personal hotspot instead of Wi-Fi, if you have another smart phone or ipad.
3. Check Wi-Fi Settings: If the device can be reconnected to another smartphone's personal hotspot using AP mode, verify if any changes have been made to the Wi-Fi settings, such as the SSID (network name) or password. Ensure that you enter the correct Wi-Fi credentials during the reconnection process.
4. If the device cannot be reconnected to another smartphone's personal hotspot using AP mode or if you have exhausted all troubleshooting steps, please contact our support team at support@treatlife.tech for further assistance.
1. Tap on the icon "..." located at the far right of the "All Devices" column.
2. Select "Device Management" from the options.
3. You can now rearrange the order of the devices as desired.
Click the "..." icon on the far right of the "All Devices" column --- Click "Room Management" --- Click "Add Room" --- Enter the room name and save --- Click the room just set up, and then click the front of the device '+' icon to add it to this room
To link your devices to Alexa:
1. Open the Alexa app on your device.
2. Tap on "More" at the bottom right corner of the screen.
3. Select "Skills & Games" from the menu.
4. Search for "Treatlife" in the search bar and select it from the results.
5. Tap on "ENABLE TO USE" to enable the Treatlife skill.
6. Enter your Treatlife app account and password in the provided fields.
7. Tap "Next Step" to complete the skill setup.
After linking your Treatlife app account with Alexa, the devices connected to Treatlife will appear in the "All Devices" section of the Alexa app.
By following these steps, you should be able to successfully link your Treatlife devices to Alexa.
In case you cannot find the Treatlife skill, please ensure that your Alexa app language is set to English and try again.
If you encounter an error message stating "wrong/invalid username or password," double-check for any typos and avoid using cached passwords. Manually enter your account password. Additionally, please note that the Treatlife account should be registered on the Treatlife app, not the Treatlife website.
If you face any geo-restriction issues, ensure that the Google app, Treatlife app, and mobile ID (such as the app ID) are registered in the same region.
If you continue to experience difficulties
Alexa: https://cdn.shopify.com/videos/c/o//40d73b284424457092a0827f02a0b739.mp4
Here's how to connect Treatlife to Google Assistant:
1. Complete the networking configuration of your Treatlife device in the Treatlife App.
Follow the prompts in the app to complete the networking configuration of your device.
Note: In the app, change the device name to something easily identifiable like "Alexa." Usually, names are in English, such as "bed light."
2. Configure your Google Home device.
(If you have already configured Google Home, you can skip this step. The following instructions are based on the iOS client)
1). Ensure that your Google Home device is powered on and connected to a Wi-Fi network.
2). Open the Google Home app on your phone. After successfully logging in, tap on the menu in the upper left corner and select "SET UP" to set up Google Home.
3). You will hear a sound to confirm that you are connected to the correct device. Tap "YES" after hearing the sound to proceed to the next step.
4). You can choose to differentiate the room where your Google Home is located from other Google devices. Then, select the Wi-Fi network and language, wait for the system to complete the configuration, and tap "next."
5). Follow the on-screen prompts to agree or disagree with certain operations. When the page displays "Google Home is ready," select "continue" to proceed to the next step.
6). You will be guided through a voice control tutorial. Once you have completed listening to the instructions, tap "FINISH SET UP" to complete the Google Home setup.
3. Key Step - Link Treatlife with Google Assistant.
(1) On the main page of the Google Home app, tap the sidebar menu in the top left corner and select "Home Control."
(2) Tap the plus sign in the lower right corner and search for "Treatlife."
(3) Locate Treatlife on the list and open it. Select the country where your Treatlife app account is located, enter your Treatlife app account and password, and tap "Link Now."
(4) Enter your Treatlife app account and password, then tap "Link Now" to link your Treatlife account. Choose the room where your device is located, and the skill will appear on the Home Control Devices list. Now you can start your smart home journey.
(5) Control your Treatlife smart device with Google Assistant. For example, to control a bedroom light, you can use the following supported commands (Note: Google Assistant currently only supports English commands):
"Ok Google, turn on/off bedroom light" (to turn the light or other device on/off)
"Ok Google, set bedroom light to 50 percent" (to set the light to a specific brightness)
"Ok Google, brighten bedroom light" (to increase the brightness of the light)
"Ok Google, set bedroom light to red" (to set the color of the light; this function is only supported by color-changing lights)
If you are unable to find Treatlife in the Google Home app, please set the Google app language to English and try again.
If you receive an error message regarding the password and account, please check for any typos. Do not rely on web page caching for the password; manually enter the account password. Additionally, ensure that the account password is registered in the Treatlife app, not on the Treatlife website.
If you encounter geo-restrictions, please ensure that the Google app, Treatlife app, and mobile ID (such as the app ID) are registered in the same region.
If you encounter any issues while trying to link Treatlife using the Treatlife app, you can try using the Smart Life app instead. Thank you.
If you still have problems or need further assistance, please feel free to send an email to our support team at support@treatlife.tech. for more assistance. Thank you.
Quick Setup Guide:
Step 1: Add Device
Download and install the Treatlife app on your mobile device.
Ensure that at least one device that supports SmartThings is listed in the Treatlife app's device list.
Step 2: Modify the Device Name
Open the Treatlife app and locate the device you want to connect to SmartThings.
Modify the device name to something easily recognizable by SmartThings, such as "Living room light" or "Bedroom light."
Step 3: Login to SmartThings
Open the SmartThings app on your mobile device and log in to your SmartThings account.
Step 4: Add SmartThings Capability
In the SmartThings app, tap the "+" button at the upper right corner to add a device.
Select "Device" and then choose the "Treatlife" brand from the list.
Select the relevant device category and tap "Next."
Follow the prompts to authorize the Treatlife app by entering your Treatlife username and password.
Step 5: Control the Device
Once the setup is complete, you can now control your Treatlife device through the SmartThings app.
You can also use voice commands with Bixby to control your connected devices. Supported commands include:
"Hi Bixby, turn on the light" (or off)
"Hi Bixby, set living room to 20%"
"Hi Bixby, raise the temperature of the air conditioner" (or lower)
"Hi Bixby, change the mode of the air conditioner to auto"
"Hi Bixby, start auto cleaning for the robot cleaner"
Note:
1. Bixby language availability: English (UK), English (USA), French (France), German (Germany), Italian (Italy), Korean (South Korea), Mandarin Chinese (China), Spanish (Spain), Portuguese (Brazil).
2. Bixby is currently available on: GalaxyS20, S20+, S20 Ultra, Z Flip, Fold, Note10, Note10+, Note10 Lite, S10, S10+, S10e, S10 Lite, Note9, S9, S9+, Note8, S8, S8+, S8 Active, A71, A51, A90, A80, A70, A70s, A60, A50, A50s, A8s, A9 2018, A9 Star, Tab S6, Tab S5e, Tab S4, Tab A 10.5”, Tab Active Pro, Watch Active2, Watch Active, Watch, W20 5G, W2019, W2018
If you encounter an error regarding the password or account, please check for any typos. Avoid using web page caching for passwords and manually enter the account password. Additionally, ensure that the account password is registered in the Treatlife app, not on the Treatlife website.
If you experience geo-restrictions, please check that the SmartThings app, Treatlife app, and mobile ID (such as APP ID) are registered in the same region.
If you continue to have problems, please send an email to our support team at support@treatlife.tech for further assistance. Thank you.
If Treatlife is not listed on the Alexa or Google Home app, please try the following steps:
Kindly set the Alexa/Google Home app language to English, and then check the app again to see if Treatlife appears in the list.
If you are still unable to find Treatlife on the Alexa or Google Home app, you can try using the Smart Life app as an alternative.
If you continue to experience issues or have any other questions, please contact our support team at support@treatlife.tech for further assistance.
1. Check for typos: Ensure that you have entered the username and password correctly. Double-check for any typing errors that might be causing the login failure.
2. Avoid using cached passwords: Do not rely on cached passwords. Instead, manually enter the username and password to ensure accuracy.
3. Treatlife account registration: Verify that your Treatlife account is registered on the Treatlife app, not on the Treatlife website. If you have registered on the website, kindly download the Treatlife app and register your account again within the app.
4. Change password: If the issue persists, you can change your password by following these steps:
Enter the APP --- Profile --- Click the setting icon in the upper right corner --- Account and Security --- Change login Password --- Get Verification Code --- Enter the verification code you received then the password will be changed.
(5)Try Smart Life app: You can download the Smart Life app and attempt to link Treatlife to Alexa or Google Home using the Smart Life app instead.
If you still experience problems or require further assistance, please contact our support team at support@treatlife.tech for prompt help. Thank you.
Check regional settings: Ensure that the Google app, Treatlife app, and mobile ID (such as APP ID) are registered in the same region. Regional inconsistencies can sometimes cause connectivity issues.
If you are still unable to connect your device to Google Home/Alexa after verifying the regional settings, please contact our support team at support@treatlife.tech for further assistance.
Here are some steps to troubleshoot the issue:
1. Check device status in Treatlife app: Verify whether the device is offline in the Treatlife app. If it is offline, please wait for a while as it may be due to poor network signal. The device should come back online when the network signal improves. Additionally, you can try restarting your router to ensure a stable connection.
2. Disable skill and recheck: If the device is online in the Treatlife app and can be controlled successfully, disable the Treatlife skill on Alexa/Google Home and then enable it again. This can refresh the connection and resolve any communication issues.
3. Delete and reconnect the device: If the previous steps did not resolve the issue, delete the device from the Treatlife app and then reconnect it. Follow the standard setup process to ensure a proper connection between the device and the app.
4. Contact support: If you have attempted all the above suggestions and the device still shows as offline, please reach out to our support team at support@treatlife.tech for further assistance.
After adding the device to the Treatlife app using HomeKit information, it will be automatically synchronized and linked to both Treatlife and Apple HomeKit.
For detailed instructions, please refer to the following link:
https://www.treatlife.tech/apps/help-center#hc-how-to-connect-the-switch-to-treatlife-app
Alternatively, you can directly add the device to Apple HomeKit. Open your Apple Home app, tap the "+" button in the top right corner, select "Add or Scan Accessory," and follow the prompts to proceed to the next step.
1. For Siri, scenes, and automation settings, you can visit the following link: https://support.apple.com/en-us/HT208280
2. Remote Control: To control your HomeKit devices remotely when you're away from home, you'll need to set up a HomePod, Apple TV, or iPad as a home hub. This allows you to access and control your devices using the Home app on your Apple device from anywhere with an internet connection.
3. Device Sharing: While you can't share individual devices, you can invite family members to your HomeKit setup through the Home app. This allows them to access and control all the devices and scenes within the home.
Yes. Please check details here:
https://www.treatlife.tech/apps/help-center#hc-how-to-connect-the-switch-to-treatlife-app
Select the device you want to remove in Apple Home, click the settings in the lower right corner and drop down to the last option "Remove Accessories" or enter "HomeKit Information" in the Treatlife APP to remove the device.
If you add and bind a device in the Treatlife app, you can control it in both APP. However, if you add it in Apple Home without binding it in the Treatlife app, you can only control it within Apple Home.